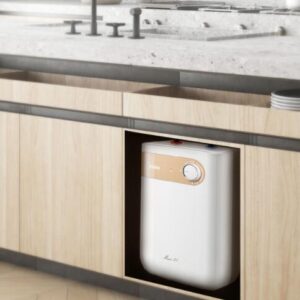
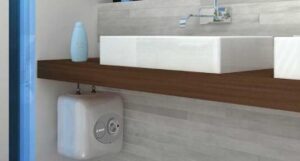
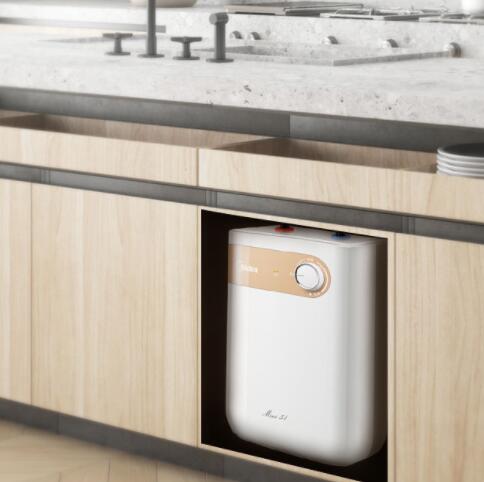
Are you tired of waiting for hot water to reach your kitchen sink? A rapid electric water heater is here to solve your problem. Similarly, with this version, you won’t waste your time while running much water until it becomes hot enough to serve your purpose. You might be wondering whether you will achieve the level of hotness you expect. However, this version is more efficient than other methods. The tankless water heater is a small engineered version that will comfortably fit into you under the sink. Generally, this method might sound complicated, but I assure you that this is the most straightforward version to install.
What Should You Know Before Installing a Tankless Electric Heater

With this version, adequate preparation is the throughway to complete the installation. However, there are fundamental questions that you have to ask yourself before you embark on installation. How accessible will your electric heater be in case of any future breakage? When positioning it under your sink, ensure that there is adequate space that will allow you to check on its performance continually and reachable whenever servicing is required. Moreover, have you considered the safety of your children? This tankless electric heater should not be accessible to your children to avoid unnecessary accidents. You should seal or lock the pace of work when you are done working on it.
Additionally, it has been confirmed that a high percentage of people always ignore the manual that accompanies the heater; you shouldn’t be among them. Finally, how is the condition of you under the sink? Before you install it, make sure that the place is clean and should be free from dust and humidity.
How to Install a Tankless Water Heater Under the Kitchen Sink
Before making any installation, you must know the structure of the plumbing under. This doesn’t mean you should be a plumber; anyone can complete the process. Similarly, ensure that you have your hand gloves on. Here are the tools require and steps you should follow:
What do you require?
CPVC primer, tape measure, thread seal tape, catch pan for water heater, brass hex nipples, CPVC cement, liquid thread sealant, pipe cutter, deburring tool, CPVC pipe, adjustable wrench, two braided stainless-steel supply, and a 90-degree CPVC elbow
Steps
Step #1
Using a tape measure, acquire the length of the water heater. Measure the water carrying pipe under the sink, the length equivalent to that of the water heater. Cut out the pipe and make sure that the removed portion should be in the middle of the water carrying a pipe. In other words, do not cut at the corner, leave an allowance.
Step #2
Use a deburring tool to scrap the ends of the pipe expected to connect with the water heater. Make them as smooth as possible. Identify the CPVC adapter; it has a male and a female end. Apply the paint on the male end with a CPVC primer and coat it with a CPVC cement.
Step #3
Insert a 90-degree elbow into the one end of the pipe. Immediately after that, apply the liquid thread sealant on the CPVC male adapter and twist the end threaded into the female end on the valve on the top tank. Use the wrench to tighten the adapter.
Step #4
Water adapter always comes with two brass hex nipples. Use tape to wrap the threads of the two nipples. Cut one of the steel Twist it into the inlet of the cold water and outlet. Tighten the adapter using the adjustable wrench.
Set the water heater catch pan beneath the sink and ensure that the water heater rests on the pan.
Step #5
Ensure that you turn off the valve releasing hot water to the faucet and loosen the supply line and the faucet connectors. Then, use a tape measure to obtain the distance between the supply valve and the water inlet nipple for cold water. Again, obtain the measurement between the hot water outlet nipple and the faucet connection.
Step #6
Measure the distance between the supply valve and the cold-water inlet of the water heater. Using the measurement obtained cut out one of the steel supplies of the same length. Fit one end of the steel supply line on the water heater nipple and match the other end on the end of the original supply line.
Step #7
Obtain the measurement length of the hot water outlet and the faucet connector. Use the measurement to cut out the same length of the second supply line. With this second line, match one end on the original supply line and the other end on the water heater nipple.
Step #8
Having fulfilled the above step, connect one steel supply line to the water heater nipple and the valve of the hot water. With the second steel supply line, connect it to the water heater nipple and faucet. Make sure you tighten all the connections with an adjustable wrench.
Step #9
Turn on the faucet and the hot water valve. Once you have established a good supply of water, turn off the faucet.
How Do You Identify the Pipe Under the Sink if It Works with Tankless Water Heater
The pipes that are involved in this process should be able to accommodate a maximum water temperature. However, there are various pipes in the market but identifying the appropriate one might be a challenge. Similarly, here are some of the features of a tankless water heater appropriate pipes.

1 Size of the pipe
What size of a tankless water heater would you want to install? The size of the pipe must be conveying a certain amount of water supported by the heater. This will dictate how the water will be.
2 Material used
A selection should be based on the ability of the pipe to withstand a maximum temperature. However, some pipes might withstand but will be for a short period. The most suitable pipes for hot water supply include copper, polybutylene, cross-linked PVCs, and random polypropylene.
3 Design
The plumbing fixtures should accommodate the installation of the water heater. Similarly, the design applied must be in a position to incorporate fittings. The design should be free from sharp corners and should have a free space. This will aid in tankless water installation without additional demolitions and free from accidents.
Recommended Under Sink Tankless Water Heaters For Easy Installation
Conclusion
The installation of the tankless water heater has become one of the most sophisticated ways compared to the other versions. However, its installation doesn’t require any skills making it more friendly. With this version, you are required to be conducting checks to confirm if there’s any maintenance required. Enjoy the fastest way to run hot water since you don’t have to wait to fill any tank for heating.
You May Also Interest In:


